12 Days of Christmas Cookies – Easy Chocolate Fudge
by Amy Johnson, Managing Editor, HockeyPub.com PHILADELPHIA, PA — Okay, so today’s recipe isn’t really a cookie – it actually falls more into the candy category. But it’s bite-sized and portable just like a cookie and can be tucked into all the nooks and crannies of a plate of cookies, which is why I’ve chosen to include it in our series.
This is not taffy-like fudge that attempts to loosen your fillings and stick to the roof of your mouth. The fudge we’ve made here is smooth, creamy, chewy, and melts in your mouth. Beware: it’s rich, super-chocolatey, and oh-so-hard to eat just one! And the best part? This recipe is done entirely in the microwave, giving you quick prep and even quicker cleanup.
Easy Chocolate Fudge
Recipe courtesy of “Kraft Food & Family”, Holiday 2008/Winter 2009
 Prep time: 10 minutes (plus refrigeration)
Makes 25 pieces of fudge
Ingredients:
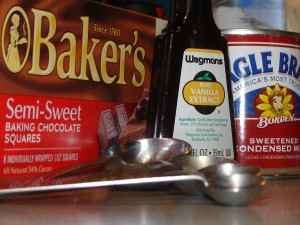
1 pkg. (8 squares) Baker’s Semi-Sweet Chocolate
1 14oz. can sweetened condensed milk
2 teaspoons vanilla
Optional add-ins:
1 1/2 cups mini Oreo cookies
1 cup peanuts
2 cups miniature marshmallows
1/2 cup peanut butter
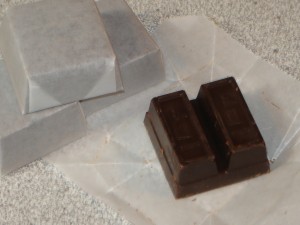
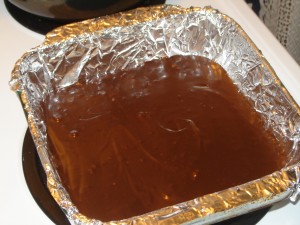
1. Line an 8-inch pan with foil, with ends of foil extending over the sides. Baker’s chocolate comes in 1 oz. individually wrapped squares to make it easy to measure just the right amount for baking with chocolate. Unwrap 8 squares.
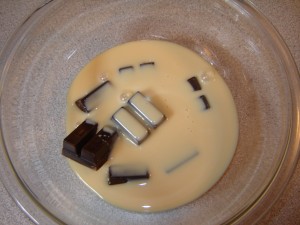
2. Place the chocolate squares and condensed milk in a large microwave-safe bowl.
3. Microwave on HIGH for 2 minutes. Remove bowl and gently stir.
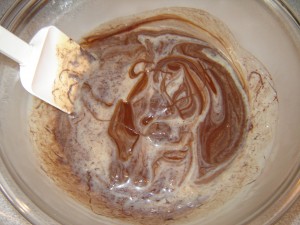
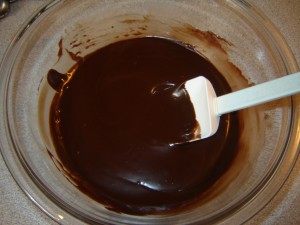
4. Continue to microwave on HIGH for 1 more minute. Stir until the chocolate is completely melted and glossy, then stir in the vanilla. (If you’d like to stir in mini Oreos, mini marshmallows, or peanuts, do so now as well.)
5. Spread fudge in foil-lined pan. (If you used an add-in above, place an Oreo, marshmallow, or peanut in 5 rows of 5 on top of the fudge.)
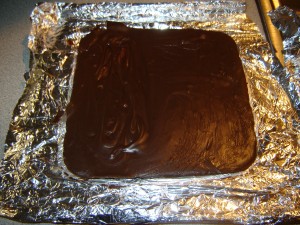
6. If you’d like to use peanut butter as an add-in, drop it by the teaspoonful on top of the fudge and use a butter knife to swirl it into the warm fudge. Cover with plastic wrap and refrigerate for at least 2 hours or until fudge is firm. Use the foil handles to lift fudge from pan and onto a cutting board.
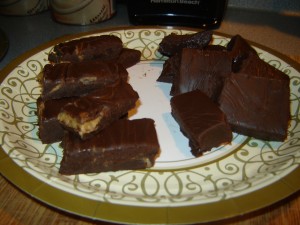
7. Cut into squares, using the toppings as guidelines if you chose to add them in. The batch I made here was half plain fudge and half peanut butter fudge. Tasty!!
Be sure to check back tomorrow for our next holiday cookie recipe – Date Nut Bars! And if you missed any of the previous recipes in this series, take a moment to check them out below:
Day 1 – Golden Chocolate Chunk Nutty Bars
Day 2 – Inception Brownies
Day 3 – Traditional Butter Cookies
Day 4 – Devil’s Food Peanut Butter Chip Cookies
Day 5 – Sriracha Peanut Butter Cookies
Day 6 – Easy Jam-Filled Cookies
Day 7 – Raspberry Cheesecake Bars
Day 8 – Eggnog Cookies
Day 9 – Maid of Honor Tarts
Photo credit: Amy Johnson



There is 1 Brilliant Comment
Trackback URL | Comments RSS Feed
Sites That Link to this Post